# Install Odoo18 sur debian 12
## Step 1. Login to VPS and Update the System
First of all, we need to log in to our Debian 12 VPS through SSH using your favorite terminal:
ssh root@IP\_Address -p Port\_number
Replace “root” with a user with sudo privileges. Replace “IP\_Address” and “Port\_Number” with your server’s IP address and SSH port number. Next, let’s make sure that we’re on Debian 12. You can do that like this:
```
# lsb_release -a
```
The command should return an output similar to this:
```
No LSB modules are available. Distributor ID: Debian Description: Debian GNU/Linux 12 (bookworm) Release: 12 Codename: bookworm
```
Before starting, you have to make sure that all Debian packages installed on the server are up to date. You can do this by running the following commands:
```
# apt update -y
```
## Step 2. Install Dependencies
At the time of this writing, Debian 12 ships with Python 3.11. Since Odoo 18 requires at least Python 3.11, we do not need to install a new Python. Let’s install its dependencies first before proceeding to the next step.
```
apt install build-essential wget git python3.11-dev python3.11-venv \ libfreetype-dev libxml2-dev libzip-dev libsasl2-dev \ node-less libjpeg-dev zlib1g-dev libpq-dev \ libxslt1-dev libldap2-dev libtiff5-dev libopenjp2-7-dev libcap-dev
```
## Step 3. Add System User
There are some methods to install Odoo. The simplest and easiest way is to install it from the repository. But we are going to install Odoo 18 using a Python virtual environment. Since it will be running under a regular system user, we will create a new system user. Let’s execute this command below to add a new system user.
```
# useradd -m -d /opt/odoo18 -Urs /bin/bash odoo18
```
Alright! A new system user named ‘odoo18’ has been added. Its home directory is /opt/odoo18, which is the directory we are going to use for the installation.
## Step 4. Install PostgreSQL
Please be informed that Odoo only supports PostgreSQL. In this step, we will install a PostgreSQL server from the default Debian 12 repository.
```
# apt install postgresql
```
After installing PostgreSQL, the service will automatically run, and now it is time to create a PostgreSQL user with the same name as the new system user. Run the following command to create a PostgreSQL user:
```
# su - postgres -c "createuser -s odoo18"
```
Our Odoo 18 will run the service using the new PostgreSQL user. Let’s proceed to the next step.
## Step 5. Install wkhtmltopdf
Wkhtmltopdf, a command line tool, is an open-source solution for converting HTML data into PDF format using a Qt Webkit. Debian 12 also provides this package in their repository, but we will use the patched with QT version. However, since the .DEB package for Debian 12 is still not available on their official download page.
```
# wget http://archive.ubuntu.com/ubuntu/pool/main/o/openssl/libssl1.1_1.1.1f-1ubuntu2_amd64.deb # apt install ./libssl1.1_1.1.1f-1ubuntu2_amd64.deb
```
```
# wget https://github.com/wkhtmltopdf/packaging/releases/download/0.12.6.1-2/wkhtmltox_0.12.6.1-2.bullseye_amd64.deb # apt install ./wkhtmltox_0.12.6.1-2.bullseye_amd64.deb
```
If you see an error message, you can execute this command:
```
# apt install -f
```
## Step 6. Install Odoo
In this step, we must switch to the system user we created earlier. Let’s switch to the system user ‘odoo18’ to download Odoo files from GitHub and create a new Python environment.
```
# su - odoo18
```
Next, let’s download Odoo from GitHub.
```
$ git clone https://www.github.com/odoo/odoo --depth 1 --branch 18.0 odoo18
```
### Create a Python virtual environment.
This Odoo installation method enables you to install multiple Odoo versions on your server by using a Python virtual environment. Let’s create a new Python virtual environment for our Odoo 18.
```
$ python3.11 -m venv odoo18-venv
```
At this point, we have a new Python virtual environment under the directory /opt/odoo18/odoo18-venv. We need to activate it before installing Odoo.
```
$ source odoo18-venv/bin/activate
```
Once executed, your shell prompt would look like this:
```
(odoo18-venv) odoo18@debian12:~$
```
Next, let’s install Odoo 18.
```
(odoo18-venv) odoo18@debian12:~$ pip install wheel setuptools pip --upgrade (odoo18-venv) odoo18@debian12:~$ pip install -r odoo18/requirements.txt
```
Wait until the installation finishes; it will be under the directory /opt/odoo18/odoo18. We can create a new directory to store our custom Odoo add-ons now.
```
$ mkdir /opt/odoo18/odoo18/custom-addons
```
Done! Let’s exit from user ‘odoo18’ and create an Odoo configuration file.
```
$ exit
```
The command above should bring you back to the previous user, in this case, root.
```
nano /etc/odoo18.conf
```
Paste the following content into the file.
```
[options] admin_passwd = m0d1fyth15 db_host = False db_port = False db_user = odoo18 db_password = False addons_path = /opt/odoo18/odoo18/addons,/opt/odoo18/odoo18/custom-addons
```
Replace **m0d1fyth15** with a stronger password. This will be your Odoo’s master password. Save the file, then exit from nano editor.
## Step 7. Create Odoo Systemd Unit file
To manage the newly installed Odoo 18, we need to create a systemd service file. Let’s run the command below to complete this step.
```
# systemctl edit odoo18 --force --full
```
The command above will bring you to a text editor. Insert the following content into the systemd unit file.
```
[Unit] Description=odoo18 Requires=postgresql.service After=network.target postgresql.service
[Install] WantedBy=multi-user.target
```
Save the file, then exit. And do not forget to reload the systemd service and then run Odoo.
```
# systemctl daemon-reload # systemctl enable --now odoo18
```
Check if Odoo is starting by running this command:
```
# systemctl status odoo18
```
Now, you can navigate to http://YOUR\_SERVER\_IP\_ADDRESS:8069, and you will see the default Odoo page
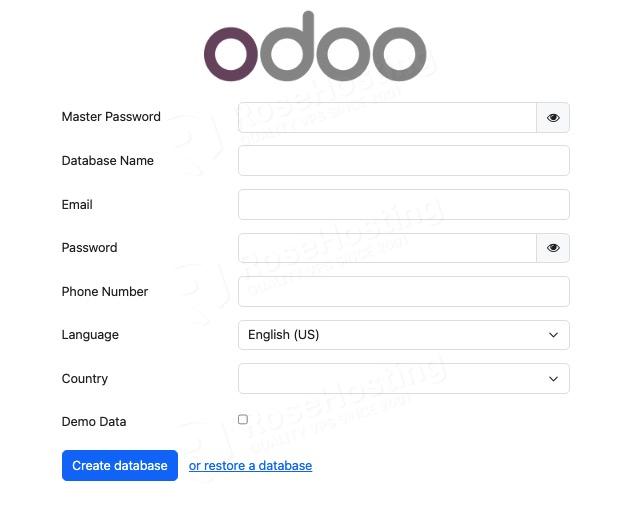When working with an Odoo database, you will be prompted for the master password. The master password is the one in your Odoo configuration file; it is the value of admin\_passwd. Make sure to use a strong password for your Odoo master password.